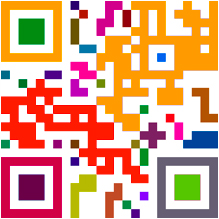
Creating QR codes is straightforward and simple in Adobe Indesign. We show you how in our Indesign courses. 
Advertising billboards, posters and printed ads often display a QR (Quick Response) code which can be scanned with a Smartphone app. This reads and decodes URL information and redirects the consumer’s phone browser to the company website.
The QR code generated in Indesign is a high-fidelity graphic object that behaves exactly like the vector art native to InDesign.This graphic can be scaled and filled with colours. You can also apply transparency, effects and spot colours. It can also later be copied and pasted into Illustrator.
First create a Frame on your page in Indesign. Then go to the Object drop-down menu and choose Generate QR Code – the dialog box will open. In the Content tab, there are various data types in the drop-down list: Web Hyperlink, Plain Text, Text Message, Email, Business Card. Choose one of these and appropriate options will appear.
If you want to add colour to the QR, go to the Colour tab. By default it’s black on a transparent background. Hit OK when done. If you did not create a frame, you can simply click on the page and it’ll come in at its default size of 30 x 30 cm. Once inside a document, the QR code is treated simply as an EPS object. A tooltip will appear when you hover over it, showing the embedded code.
To edit it, double-click on the object, or right-click, or go to Object > Edit QR Code. It can also be moved, scaled or rotated like any other object.
More tips can be found at the Sydney Indesign User Group which meets regularly in the city, and is a free forum for designers to discuss topics and the latest Indesign features. See many examples of our own clients’ work on our Facebook page.
Other related Indesign Blog Posts:
- Indesign images and text
- Indesign workflow
- Indesign templates
- Indesign page numbers
- Indesign add hyperlink

 Graphic Design Courses